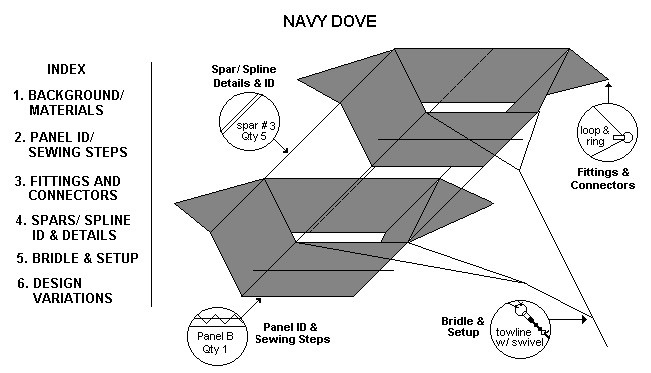

The proportions for the Navy Dove are from the 1997 the British book "Kites". This plan size is of the "Navy Dove - Small" shown in Gallery III. This scaled down size is easier to carry around and doesn't have the pull as the larger size. The size of the "Navy Dove - Large", also shown in Gallery III, is the size suggested in the book. Multiple all the plan dimensions shown for the panels here by a factor of 1.3x for the larger size. The original book plan called for "cusping" 1/2 inch in all the panels between splines. I did this on the larger version and did not "cusp" the smaller version. I didn't see any difference when flying.
The construction details, rigging, sparring and graphics are
mine. This kite is easy to construct and the interesting thing about
the design is it uses lines to hold its shape as opposed to a typical
box kite which uses crossed spars. These lines are truly needed and are
shown in the Fittings/ Connectors Section.
The materials needed for construction include:
Ripstop nylon, 3/4 oz. -- Approx. 4 yds
Wood Dowel, 1/4/" dia. -- 5 pcs x 48" lg.
Graphite Tube, 3/16" dia. -- 3 pcs x 48" lg.
Graphite Tube, 3/16" dia. -- 2 pcs x 32" lg.
(Wood dowels, Graphite or Epoxy Tubing could be used interchangably.)
Misc. -- arrow nocks, fiberglass or brass tubing for the
external
ferrules, barrel beads, 1/2" dia. metal slip
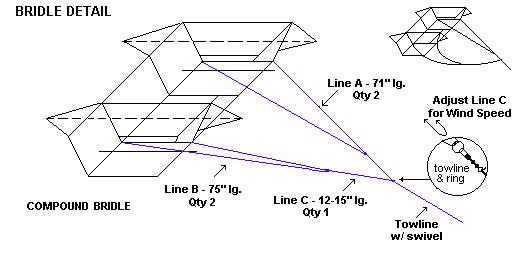
rings and 25 yds of bridle line.
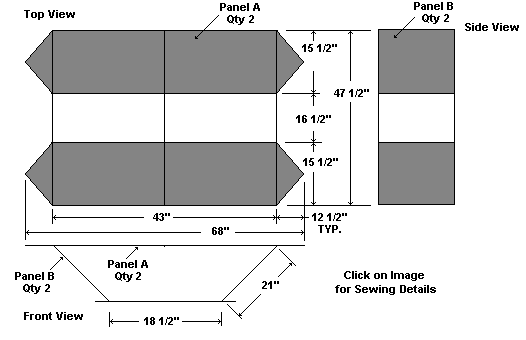
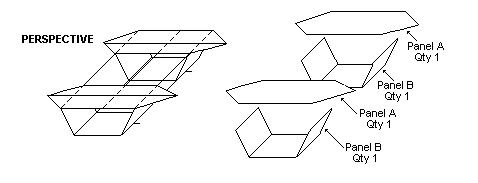
The panel sizes shown in the detailed instructions include 1/4" hem allowance for a single folding over of the edges of the fabric. If you want to double fold, add another 1/4" to your paper or paste board patterns.
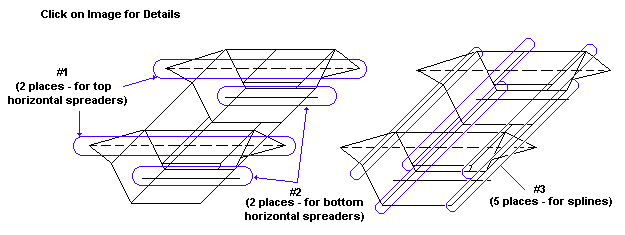
As mentioned in other plans, I have gotten in the habit of using metal slip rings on the connection loops. This probably adds unnecessary weight to the kite, but I like the idea of everything being more durable. This is also true for my use of short pieces of fiberglass tubing as ferrules to hold the ends of spars. These ferrules allow me to easily assembly the kite by myself without any arrow nocks slipping out of a ring or loop while I am at the other side of the kite, Whatever end fittings you feel comfortable using is always my suggestion.
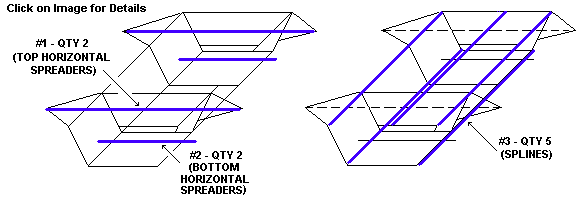
| ITEM | QTY | DESCRIPTION |
|---|---|---|
| #1 | 2 | .230" dia. x ~70" lg. graphite tubing w/ an arrow nocks on each end. An external ferrule is needed to join the shorter lengths together. |
| #2 | 2 | 1/4" dia. x 32" lg. wood dowel or .188" graphite tubing. |
| #3 | 5 | 1/4" dia. x 48" lg. wood dowel. |
| Determine exact length of #1 at time of rigging. These can vary, depending upon the exact dimensions resulting when sewing the panels and installing the fittings/connectors. |
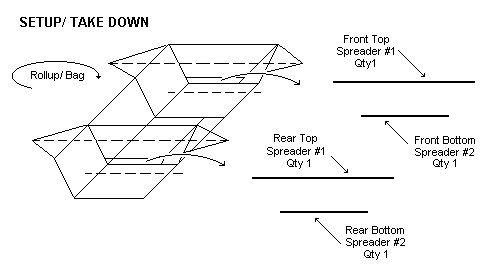
Takedown and setup requires only removing or installing the 4 horizontal spreaders, #1 and #2. The 5 splines, #3, are kept in place, rolled up with the kite and bagged.
There are instructions for making a storage
bag with the ROK plans.
DESIGN VARIATIONS / GRAPHIC OPTIONS
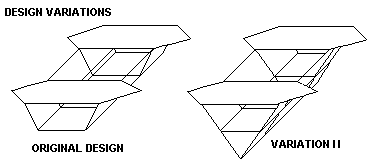

I think the flat surfaces and panel construction of this kite allow for many graphic variations.
The image above shows the three (3) I have used.