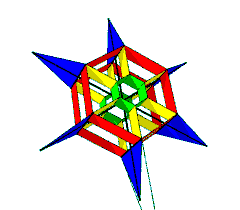
 Invented
in 1977 by Peter Waldron of Worcestorshire, England, the Waldof Box kite
is a spectacular sight in the sky and and the envy of onlookers. Whilst
certainly not a beginners kite to build, with a little time and care, neither
is it very difficult. This model is 1.8m in diameter (6ft in round numbers)
as this gives simple dimensions for the parts, but it can be easily scaled
up or down, adjusting spar thicknesses accordingly.
The sail is made up of four parts:
There are different grades of ripstop nylon. Be sure to use the crinkley sort, not the softer sort with a rubbery feel, sometimes sold as "balloon fabric", and used for soft kites. This has little resistance to shearing and so is unlikely to be successful.
The main radial spars are 12mm dowel, and the longerons are 6mm dowel.

Start by edge-binding all the edges of panels that are not going to be sewn into hems.
 Next, construct
the inner boxes with the spokes sewn between the box sections, as shown
in Fig 2. Having allowed 6mm for hems, for each seam, you can temporarily
stick the panels together with seamstick tape, then sew 6mm from the combined
edge. For the last seam, turn the box inside out. Make sure the seamstick
tape is clear of where you are going to sew, both so you can remove it
afterwards, and so it doesn't gum up your needle.
The outer box and wings are then attached to the spokes in a similar manner, as shown in Fig 3.
At the centre of the long edge of each wing, sew a strip of ripstop to form a loop through which a radial spar can pass. A piece of ripstop 4x7cm folded into 3 to make a strip 5x1.3cm will do. Sew it to the wing, but allowing it to rise up in the centre, so allowing a spar to pass through.
 Two tunnels must
now be sewn to the opposite side of the long edge of each wing, as also
shown in Fig 3, to house the longerons. Each can be made from a piece of
ripstop 16cm x 4cm, which allows for a 6mm hem on all edges before attaching
it to the wing. Position them so their ends overlap the sewing of the loop
on the other side. This gives extra strength against stretching to this
edge where it isn't sewn into the spoke and outer box.
Cut a hexagon, 4.5cm across the flats. In the centre of each of the 6 sides, drill a 12mm hole to a depth of 15mm.
If you have no alternative to wood, you may be able to strengthen it with a large steel washer on each side and a bolt through the middle.

In the case of the longerons, the line can be sewn directly to the sail. (Hopefully, your sewing machine has a special foot with a groove in it, allowing you to sew the line to the sail, with the needle passing through the line.) For the wingtips, sew a piece of line 10cm long to the wing, with 5cm sewn down each edge from the tip, but not sewn actually at the tip. Take a second piece of line, tie a loop in the end, and larks-head it to the first at the wingtip.
To tension the lines over the ends of the spars, tie a knot in the end of each. (The holes in the spar must be big enough for the knot to pass through.) Take another piece of line and tie a loop in each end. Larks-head one loop to a piece of broomhandle or similar, to act as a convenient handle. Larks-head the other loop to the line to be tensioned. The knot at the end of it will stop the larks head from slipping off.