

Every time I teach a workshop for beginning, brand new, kite sewers, someone always says: This is my first time sewing and I want to make something simple, like a Delta. Then I need to explain that the simple appearance of the Delta doesn't show that it is a very ornery critter to sew. A Delta is two big wings, and the two of them need to be EXACTLY the same or the bigger wing has more lift than the smaller wing, and the kite flys in circles. The smaller the kite, the bigger this problem is likely to be. Until a new sewer has no problem putting their stitches exactly where they want them to be every time, the Delta isn't a project they want to attempt.
A 'first time' workshop project should be simple to sew, nice to look at, and fly great.
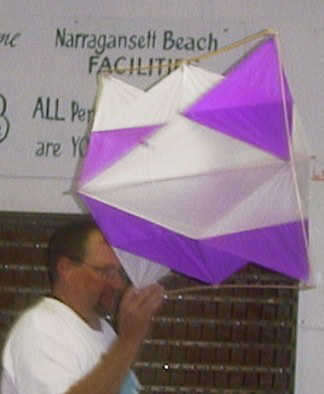
Enter the SquareFlake. As with the Delta, appearances are deceiving. It looks very complicated, but it is all straight lines. It is made from 6 simple squares. They need to be hemmed. That means that people get to practice sewing a straight line 24 times on the hems, where it is relatively unimportant, before they need to sew a straight line 'for real' when they do a seam. Because the kite is a facet kite, having a cellular structure, mistakes in hemming tend to cancel each other out. In 15 years of making these at workshops, every one ever made has been a great flyer! No flops!
When we use pre-cut parts, it takes about 4 hours to sew one of these in a workshop setting. The bulk of the time is getting the hems done. The hems take more than half the time!
The dimensons of the SquareFlake are built around using 4-foot wooden dowels.
Two 4 foot wooden dowels will make the outside frame, and a 3 foot wooden
dowel makes the Spine up the middle.
Here is the handout that was given in the workshop:
Worshop Directions
Questions? Please e-mail me!
More than you wanted to know:
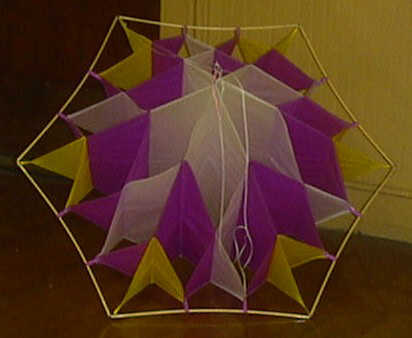
Why the name, SquareFlake? Well, when it is made with 3 squares in the middle, it has six sides like a snowflake. These 6-sided versions of the kites were once made and marketed (maybe they still are) as Snowflakes. A 3-step (traditional, standard) Snowflake has 15 squares, more than twice the parts of our Square Flake. That means more than twice the sewing to make. That makes it less attractive as a first time project. It is not more difficult, just more work. Figure at least 8 hours on a sewing machine. That is a lot for a first time project.
Snowflake Two-Step:
There is a way to make a Snowflake with fewer parts. Essentially, it is our humble SquareFlake made with 3 big squares in the middle instead of 2. Now we have 3 big squares, and 6 little ones, for a total of 9 parts. That's a bit easier than 15. But you are still lookng at 6 hours of sewing time.

More variations on a theme: The Reflex.
I think it was Maurizzio Angiletti who first made kites he called 'controverto'. The closest translation being 'reflex'. Basically, the explanation is: Take a Snowflake, remove the middle, and you get a Reflex. It is good explanation, but NOT the way to make the kite. The best way to make it is to make 4 triangular parts for each square. That means 60 pieces . . .
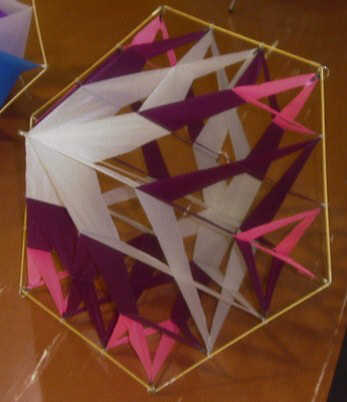
The same thing is possible with our humble SquareFlake. Just remember, it is 4 times the parts to sew.
Back to Workshop Projects List: http://www.geocities.com/gengvall/2003/projects.html