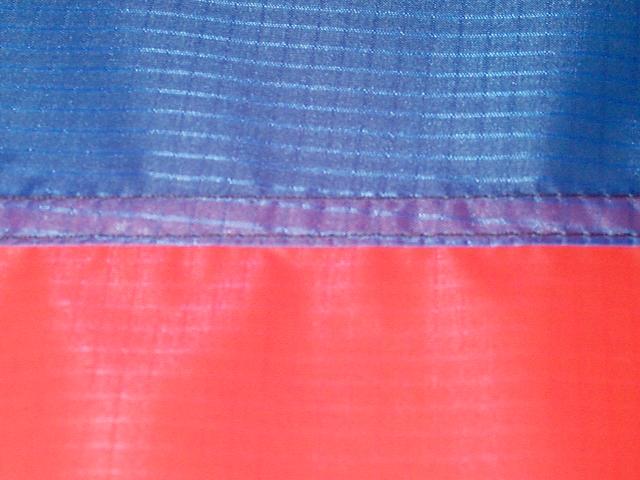
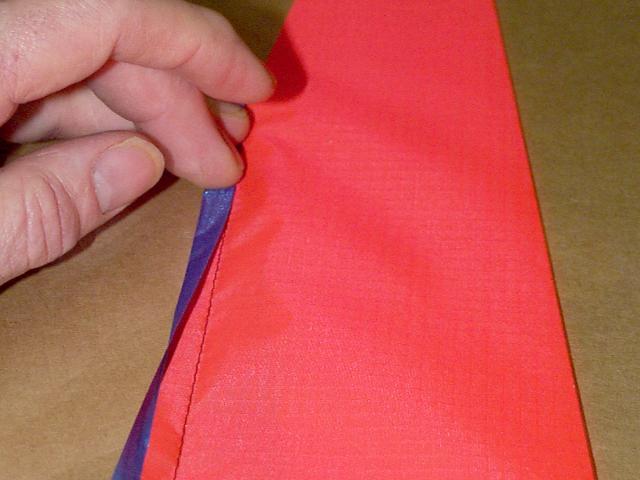
All of the seams on the Pizazz sail are flat fell seams. Simply put, this means we lay two layers of cloth together back to back and sew down the edge leaving a seam allowance. We then lay the two layers of cloth out flat, roll the seam allowance under and stitch down the cloth again. This gives us a seam similar in appearance to the seam down the outside of a pair of jeans. All of my seam allowances are 1.5 cm and I use a 3 mm straight stitch. I had to switch kites as the white and read weren't giving me sufficient contrast to show up against the white background.
The seam allowance is the distance between the edge of the two pieces of fabric and the line we intend on sewing. All pieces of the Pizazz are cut to allow a 1.5 cm seam allowance. We will always sew the cloth facing "back to back" Today we are going to sew the wing sections together.
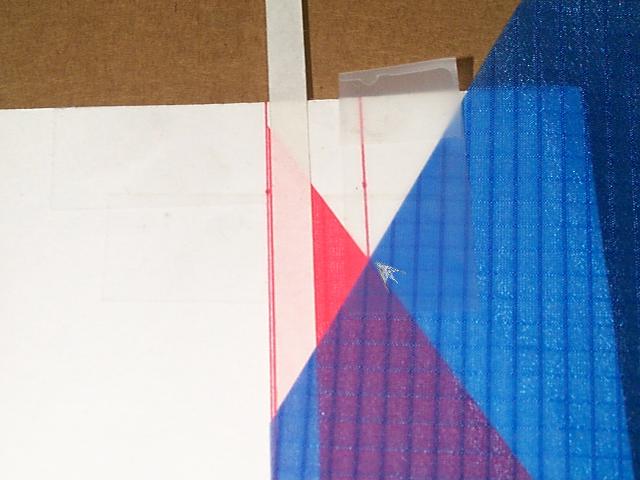
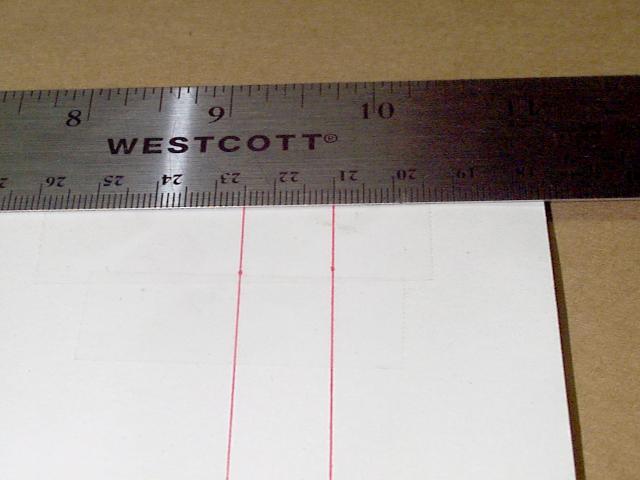
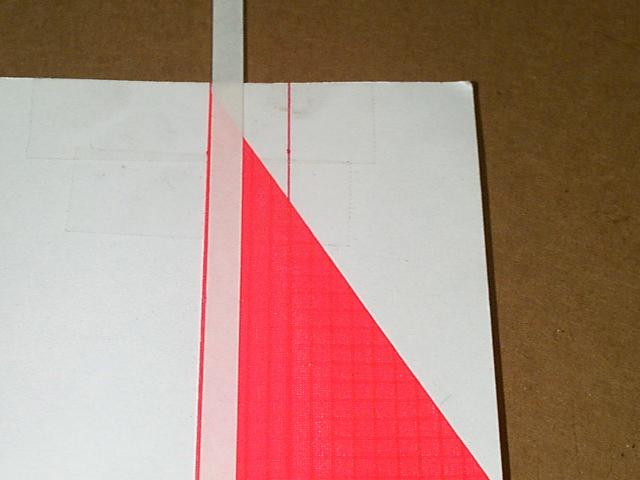
For the completed wings to fit correctly to the center sail it is very important that the individual wing panels be aligned correctly when sewn together. The sharp angle of the wing panels makes this difficult. The edges of the wing panels have to cross 1.5 cm from the edge of the fabric. To aid in laying out the panels for sewing it helps to construct a set of two parallel lines spaced 1.5 cm apart to act as a template .
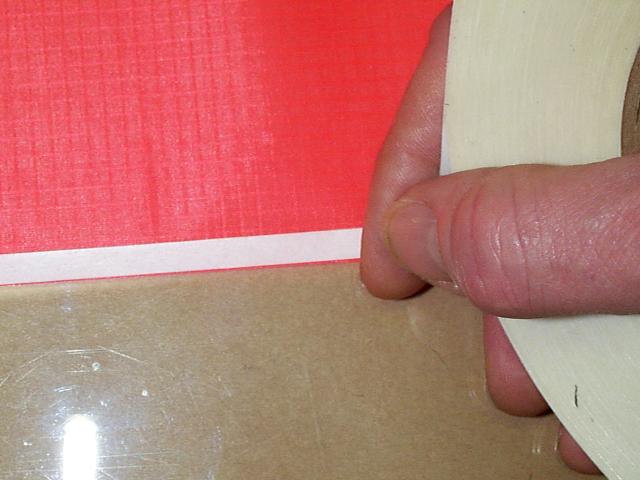
Start assembling the wing by laying the lower wing panel face down on your working surface. Then put a layer of seam stick down the top edge of the panel. It is necessary to apply a slight amount of tension to the sail panel to keep it straight as you put the tape on. I do this by laying my hand against the sail as I pull the seam stick along. If you put too much tension on the tape it will stretch the cloth and put a noticeable bow in the edge of the cloth. Leave the paper backing on the tape for now.
Once the lower wing panel is taped to the work surface I slide the 1.5 cm template under the cloth and align one line with the edge of the sail piece. Tape the template down.

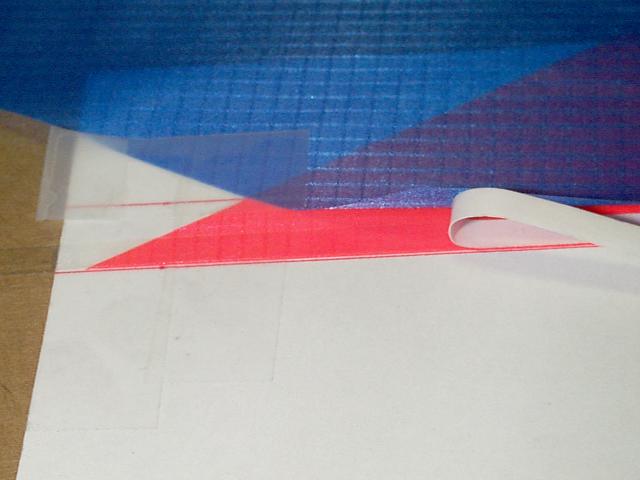
With the middle wing panel taped down slowly remove the paper backing to the seam stick by peeling it back from one end. I pull it straight back along the tape to prevent moving either layer of cloth out of line. The middle wing panel will fall down against the lower wing panel as the paper backing is removed and should lay flat against the seam stick that we put on the lower wing panel. Press the middle wing panel gently in place and remove the cellophane tape. Then carefully peel the seam stick and wing panels from the work surface and trim the ends. Make the other wing panel at this time, making sure to make it opposite of the first so you will have opposite wings. I'd hate to count the number of kites I've started and wound up two left wings!
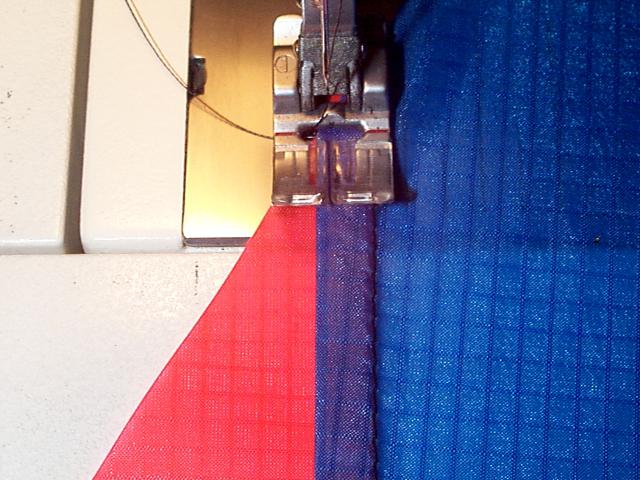
My sewing machine has guide lines along the right side of the sewing surface measured in centimeters. If your machine has these guides measured in inches you will want to measure out 1.5 cm from the needle and make yourself a guide line there. Now we sew the length of the seam standing off 1.5 cm from the edge. This allows us to sew the wing panels together using seam stick to hold them while not sewing through all that tape. I use a 3 mm long stitch on all of my seams.
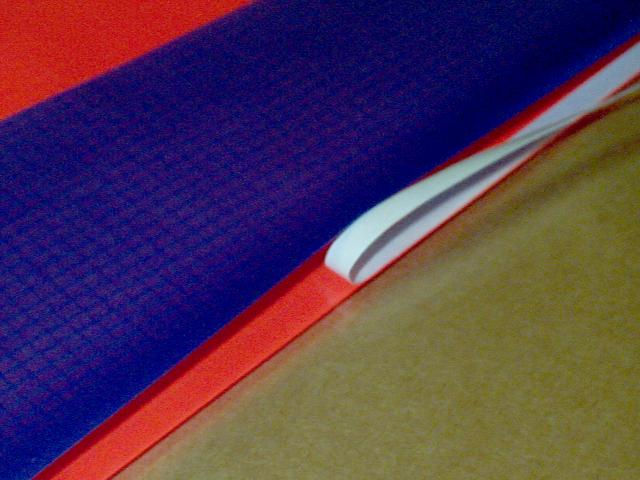
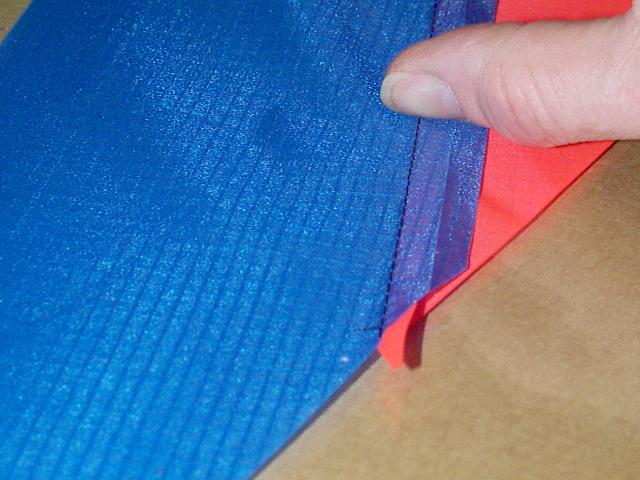
Once we have the two panels sewn together we trim away 1/2 of the seam allowance on the lower wing panel. That way we are cutting away the portion of the cloth that will be folded under as this seam will be rolled down. If the middle wing panel was white (or a vented panel) I may decide that I wanted to roll the seam up, as the white wouldn't cover up the orange very well. If this were the case I would cut away 1/2 of the middle wing panel seam allowance. I hope that didn't confuse anyone. This is not a critical measurement so I generally just slide my scissors between the layers and slide them up the seam using the tape as a guide.
Once we have cut away the entire length of the seam we peel away the excess cloth removing the seam stick with it.
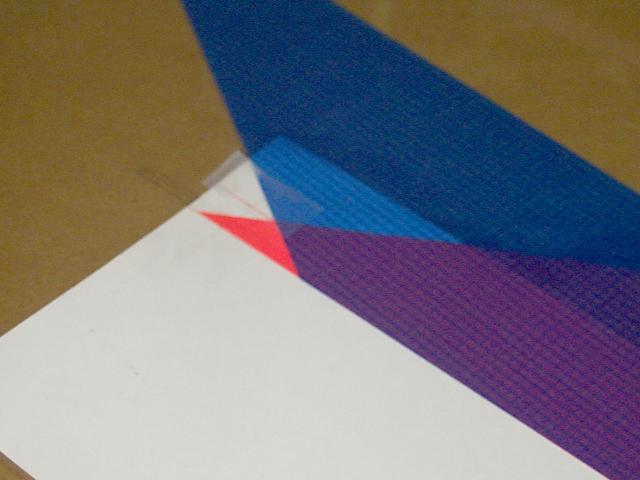
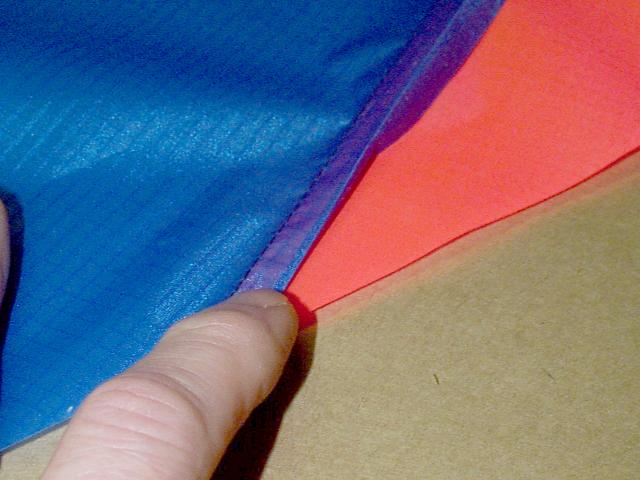
Now we fold the seam allowance from the middle wing panel over the lower wing panel. The fold should take in 1/2 of the seam allowance so the edge of the middle wing panel comes just to the seam. Fold the cloth the entire length of the seam and crease the cloth at this fold.
Next lay the wing panels out flat, face up. Pull the panels out flat and crease along the seam. Make sure you don't have any of the lower wing panel rolled under the middle wing panel.
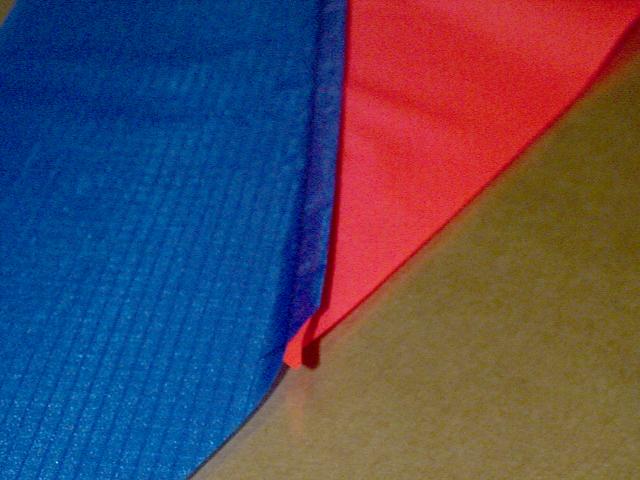
At this point you should be able to roll the seam under and have the entire wing panel lay flat against your work surface.
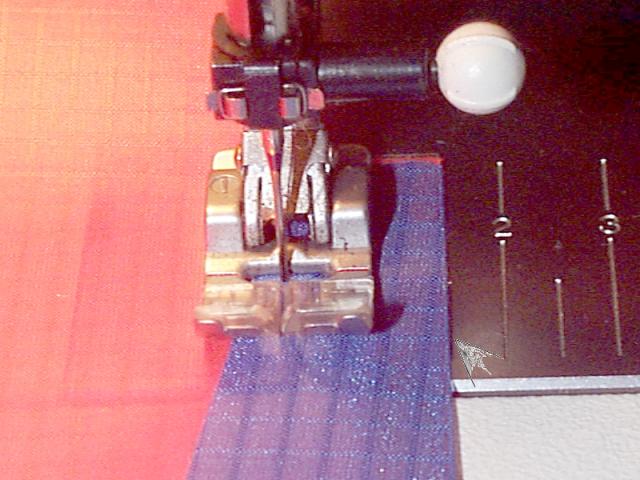
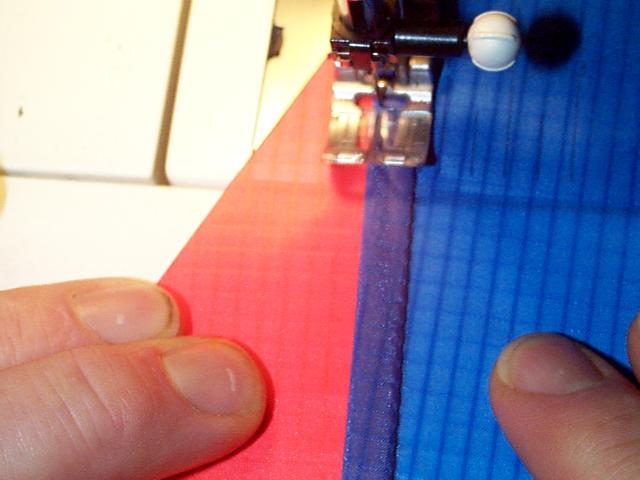
I sew the roll down with a straight stitch 1.5 mm from the edge. To do this I'm using the center of the clear plastic on the left side of my sewing foot as a guide. I'm pretty sure you will have to find your own guide on your machine. As I sew down this seam I will just make sure the fold stays under my mark.
As I sew down the seam it is necessary to apply a slight outward pressure on both sides of the cloth to make sure none of the sail gets tucked under the seam. I normally sew 4 - 5 cm before I have to stop and tuck the fold under again.
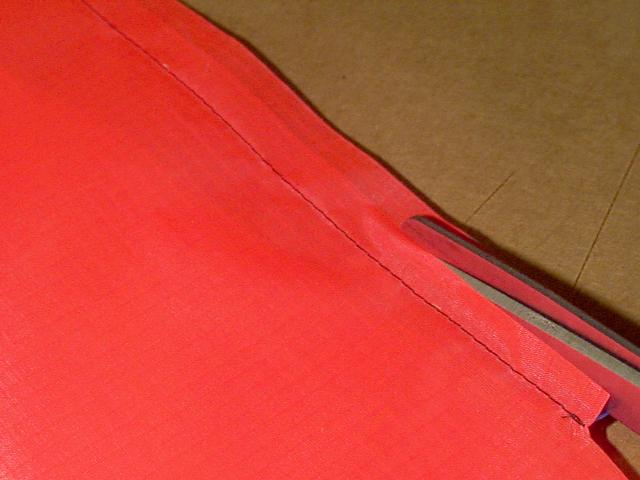
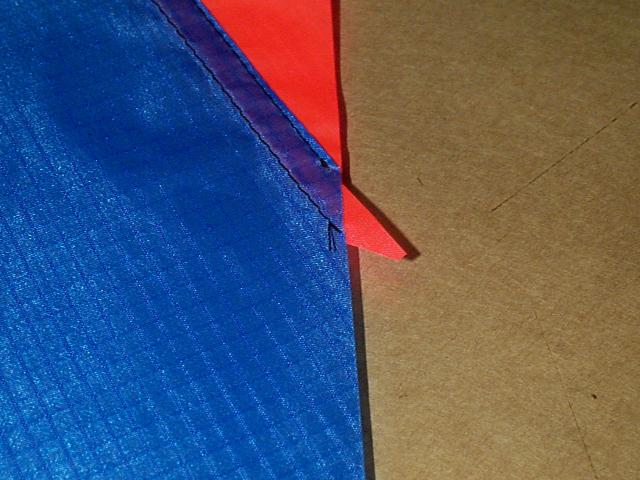
When the seam is entirely sewn we should have a wing piece that looks similar to this. This is the end of the wing section that should be aligned correctly as it will be sewn to the center sail. The closer to straight we get this end the better off we are. Due to fabric stretch and the slight errors we get in cutting the sail pieces the other end will not match exactly.
We'll get some more of this up tomorrow, time for dinner..