Panflute Kite (Revisited)
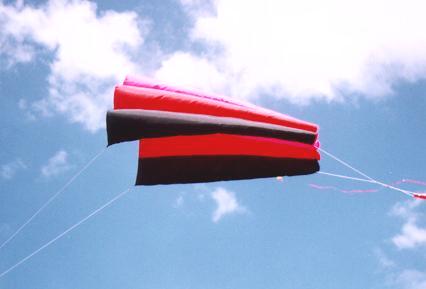
The Pan Flute is a soft kite (no sticks) made of 7 connected windsock like tubes or cells. It has a good wind range and flies at an angle of 30-40 degrees. It flys with a side-to-side sway, or wobble, making this kite very pleasent to look at in the sky, particularly with a long ribbon tail, or other decoration.
Start by making the two templates (or measure directly) to cut seven (7) of each type panel (`B' for the bottom, `T' for the top panel). For aesthetics try alternating contrasting colours for each cell or create a rainbow pattern.
The kite is very forgiving, so while a hem allowance
should be added, it isn't required.  Similarly
you do not need to use exactly the measurements suggested on the template.
A bit shorter or longer is fine, same with the widths. As long as the base
width, at the lower end of bottom templete `B', (7 cm in this diagram) is
doubled (14 cm), and quadrupled (28 cm), everything will work out.
Similarly
you do not need to use exactly the measurements suggested on the template.
A bit shorter or longer is fine, same with the widths. As long as the base
width, at the lower end of bottom templete `B', (7 cm in this diagram) is
doubled (14 cm), and quadrupled (28 cm), everything will work out.
For example:- My giant panflute is 2.5 metres long and the base width is 16 cm (making the top measurment of piece `T' 64cm wide. These were caluclated to fit the ripstop pieces I had available.

Start the process again but starting from the other end of the kite, with the opposite edge of the pieces.
The last seam is the most difficult as you have to roll both groups of panels into the middle cell you are closing off. That is the whole kite is rolled up, inside the middle tube, which is then completed inside out.
When the final seam has been sewn, pull the kite out of the middle tube to form its normal working shape.
To the loops you sewed into the outermost seams of the kite tie a bridle line approximately 2 metres long. Then tie a loop in the middle of this line to attach the flying line. Repeat for the trailing tail lines which are shorter (about a metre).
The plan calls for a drogue, to steady the kite. However a 5 metre ribbon tail will work just as well. almost anything will do as its job is only to remove some of the side-side `wobble', of the kite.
Now go fly it :-)
|
On all the pieces hem the top and bottom edges. Then starting with one `B' and one `T' piece pin them together along one side edge with the outside face of the pieces together, IE: hems outward, and sew down the edges together. This is one of the outermost seams. |

|
At this point also sew some loops at both ends of seam. These will be used to attach one end of the bridle line and tail lines of the finished kite.
Fold the top pieces along the seam, so the outside of the pieces is now outside. Taking another pair of top and bottom pieces sandwich the pieces already sewn together between these. Pin them carefully together and sew through all four pieces, to form the outer most windsock `tube'. This can be tricky so take your time and do it right.
Repeat twice more, to complete three tubes and one side of the kite.
One final point:- when I scaled up this kite I found the kite tended to collapse as too much air was lost through the ends of the tubes. To stop this I sewed about 5cm up the middle of the end of each tube, dividing the end of the tube into two. This restricted the airflow exiting the tube, increasing the internal pressure and making the kite more ridged, and less prone to collapse.
I also added some triangular side flaps, (see photo above) but this is strictly not required. and due to its large size, added a reinforcement line along the top (leading) edges of the `B' pieces, which connects to the bridle points in the corner.
This plan was developed from the internet plan published by Buck Childers, at...
This in turn was based on a short article in the Dutch magazine _De Zette Vieger_, Nbr.6 which references another kite newsletter by Piet van Stallduinen.
A single page Postscript Version of this plan is also available, as it was originally published in a Local Club newsletter.