| |
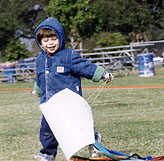
 We have used this paper bag sled kite to build
thousands of kites. Enlarge plan and use on any standard 14"x21"
paper bag. A 3" gusset works best, that's the space between the two
halves of the bag). If you send us a stamped, self-addressed
8-1/2"x11" envelope we'll mail you one bag. Kits which include
detailed instructions, flying line and kite are available for $2.00
plus shipping.
To get your free kite plans, click
here and print the plans at full size.
In case you can't
read the printout, print out these steps for putting your free kite
together:
First of all, grab some scissors, tape, string, crayons
and a glue stick.
1. TAPE: Place 3 pieces of tape in the
areas marked "TAPE HERE" to reinforce bridle holes. You will cut
this tape through the guidelines in step 2.
2. CUT: Cut off
the top and bottom of bag along the dotted guideline. Holding the
bag open, cut out the 2 yellow triangles from this side of the bag
ONLY.
3. GLUE: Using the glue stick, glue the gusset together
on both sides of the bag.
4. COLOR: Color your kite with
crayons or markers.
5. PUNCH: Using a hole punch or a pencil,
punch out the bridle holes where you applied the three pieces of
tape.
6. ATTACH: Attach a bridle and string. Cut a 6 foot
length of line and tie each end to one of the punched out bridle
holes. Tie a loop to the very center of the line. Attach flight line
to the loop.
7. TAIL: Add a tail if the wind is moderate to
strong.
FLYING YOUR KITE: With the wind at your back, have a
friend hold the kite overhead about 20 feet downwind. Holding the
line tight, signal your friend to release the kite into the air.
Pull the string hand over hand until the kite gains altitude, then
let-out line so the kite can climb in the sky! NEVER FLY A KITE NEAR
POWER LINES OR IN STORMY WEATHER! |
Copyright© 1998-2003 Kites, Tails & Toys
Web site
designed and maintained by Virtual Vision Online, Inc.
|

