Making Kite TailsFor The MBK KitesHere's the standard way I make kite tails for all the MBK series. A few photos and some comments showing you how to make plastic rings and then loop them together. Also, I show you a little trick to make the tails more 'draggy' and hence better at stabilizing. A tail improves the directional stability of the kite. This just means that the kite has a strong tendency to point its nose into the wind when aloft.
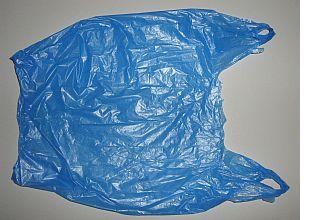
Once you have got the knack of making kite tails this way, you can just use any kind of colored plastic bags or garbage bags. Like the small blue plastic shopping bag in the photo. The smaller MBK Skewer Kites use clear freezer bags, while the 2-skewer versions look and fly great with black garbage bag tails!
Firstly, if the bag has handles, cut straight across to remove them. Then, keep cutting straight across to create rings about the width of 2 adult fingers each, for a 1-skewer kite. Make it 4 finger widths for 2-skewer kites. Accuracy is not important here. In fact, ragged edges might work better!
Throw away the handles, if any, and also the closed bottom of the bag. Now take 2 rings and loop them together, as in the photo. Gently pull the 2 rings fairly tight, then attach more rings in the same way.
Keep going until you have the required length of tail, according to the instructions for the kite. Usually it's in terms of the kite's height. For example, 'at least 6 times as long as the kite itself'. If a kite's tail is a bit longer than specified, that doesn't matter at all! Now, here's a way to make the tails more efficient...
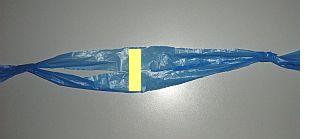
That yellow rectangle shows where I put a strip of clear (invisible!) sticky tape across the loop. This helps to hold the loop open so it drags at the airflow when the kite is flying. Another benefit is that the tail resists 'winding up' and hence losing some of its effectiveness. Use tape on every loop in the tail. Bear in mind that very long tails will make your kite fly lower. Making tails just long enough to keep the kite stable is the best idea! That's all there is to making kite tails for the MBK series. Of course, feel free to experiment with other ideas too. For example, just a simple streamer will work too, although it might need to be a bit longer to keep the kite stable. Last updated: 21 May 2008 Return to How To Make A Kite from Kite Tails All the way back to Home Page
|